Radiant Tube Heater Clearances to Combustibles: Installation Guide
When installing a radiant tube heater, the single most important safety requirement is radiant tube heater clearances to combustibles. These required distances create a three-dimensional safety zone around the heater that must remain free of materials that can burn, melt, or degrade from heat exposure.
Ignoring required clearances to combustibles is one of the most common causes of installation failures, damaged property, and fire risk. Before choosing mounting height or angle, you must understand and measure this safety zone correctly.
What Are Radiant Tube Heater Clearances to Combustibles?

Radiant tube heater clearances to combustibles define the minimum required distances between the heater and any material that could ignite or deteriorate due to heat.
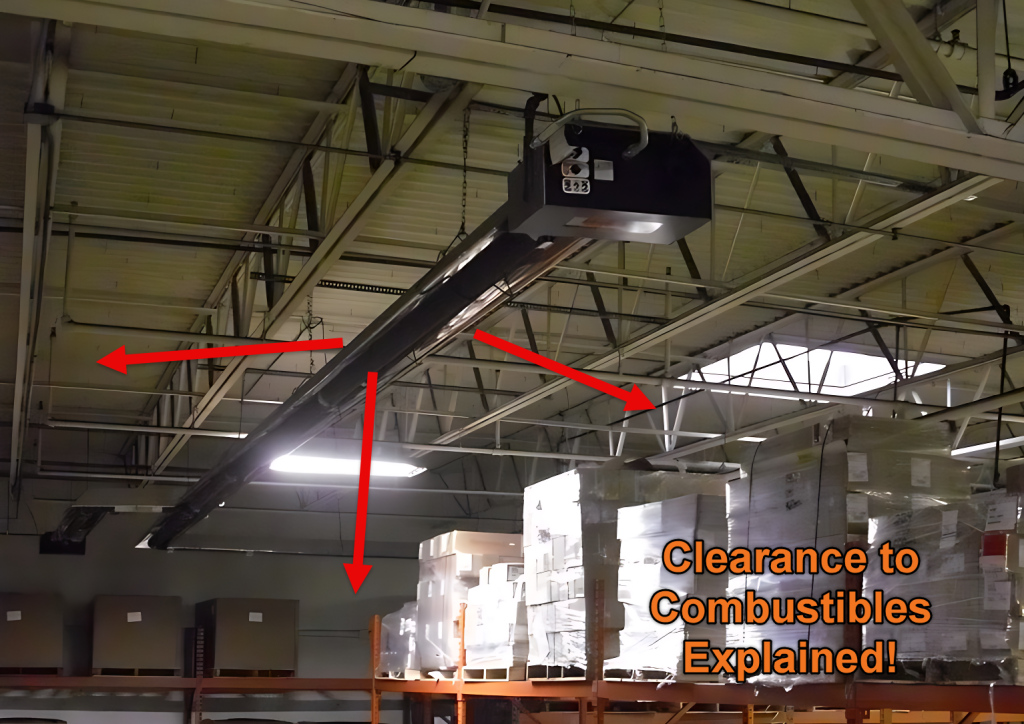
Think of it as an imaginary 3D rectangle surrounding the heater:
- No cardboard
- No wood
- No rubber or tires
- No styrofoam
- No plastics
- No stored materials inside the zone
Clearance requirements are governed by standards such as NFPA 54 (National Fuel Gas Code) and by manufacturer ANSI certifications.
Why Clearances Matter More Than Brochure Mounting Heights
Mounting heights listed in brochures are performance recommendations.
Radiant tube heater clearances to combustibles are safety requirements.
You may adjust mounting height slightly for heat distribution purposes, but you may never reduce the clearance distances listed in the installation manual.
Clearance violations can lead to:
- Paint degradation on vehicles
- Melted plastics or rubber
- Warped materials
- Building fire
How to Read a Radiant Tube Heater Clearance Chart
Every unit includes a clearance chart that specifies required distances based on:
- Mounting angle (0°, 15°, 30°, 45°)
- Model and gas type
- Tube length
- BTU rating
The chart provides different required distances for top, side/front, behind (when angled), and below.
Important: Some measurements are taken from the tube, others from the reflector depending on mounting angle. Measuring from the wrong reference point is a common installation mistake.
Example Radiant Tube Heater Clearances to Combustibles
Typical 20 ft, 75,000 BTU unit. Always verify your specific model.
0° Mounting (Tube Horizontal)
- Top clearance: 6 inches
- Side clearance: 9 inches
- Below clearance: 60 inches (5 feet)
45° Mounting (Tube Angled)
- Top clearance: 10 inches (from reflector)
- Front clearance: 39 inches
- Behind (off wall): 8 inches
- Below clearance: 60 inches
Side Shields and “BK” Extensions

Side shields (sometimes called BK extensions) can reduce required clearances to combustibles by blocking radiant energy in one direction.
They are useful when space is limited and you cannot increase mounting height or angle.
Learn more about low-intensity infrared radiant heaters and available side shield options.
Common Radiant Tube Heater Clearance Mistakes
- Assuming mounting height equals compliance
- Measuring from tube when chart specifies reflector
- Storing materials under the heater temporarily
- Ignoring behind-the-unit clearance when angled
- Forgetting that vehicles count as combustibles
Quick Pre-Install Checklist
- Locate the heater model’s installation manual.
- Confirm radiant tube heater clearances to combustibles in the chart.
- Select mounting angle or side shield configuration.
- Measure from correct reference point (tube or reflector).
- Mark and clear the entire 3D safety zone.
- Re-check clearances after installation.
Visual Explanation of the Clearance Zone
Final Note
Radiant tube heater clearances to combustibles are not optional. They are mandatory safety requirements established by national code and enforced by inspection authorities.
Measure carefully. Follow the manufacturer’s chart. Use side shields when necessary.
Need help verifying radiant tube heater clearances to combustibles?
Our team at Great Lakes Radiant can review your layout, confirm required clearances, and help ensure your radiant tube heater installation is safe, compliant, and properly configured for your space.
Give us a call, send an email, or fill out our Project Details form so we can help you install your radiant heater correctly the first time.